
If you’re looking to launch a website—whether it’s a personal blog, an e-commerce store, or a business portfolio—web hosting is the first and most essential step of How to purchase a Hosting Plan from Hostrago . Choosing the right hosting provider can make a big difference in speed, security, and support.
That’s where Hostrago comes in Known for its budget-friendly pricing, free SSL certificates, one-click installations, and fast servers, Hostrago has quickly become a favorite among Indian website owners. But if you’re new to hosting or confused about how to complete the process, don’t worry. In this blog post, we’ll walk you through How to purchase a Hosting Plan from Hostrago, complete with real screenshots to make it as easy and clear as possible. Whether you’re a beginner or switching providers, this guide will help you get online smoothly and confidently.
In this blog, we’ll guide you step-by-step on How to purchase a Hosting Plan from Hostrago, along with clear screenshots to help you follow along easily.
Step-by-Step Guide: How to purchase a Hosting Plan from Hostrago
Step 1: Visit Hostrago & Select a Plan
Go to HostraGo and explore the available hosting plans. Click on “Choose Plan” under the package you want.

Step 2: Choose a Domain Option
Option 1: Register a New Domain

Option 2: Use an Existing Domain
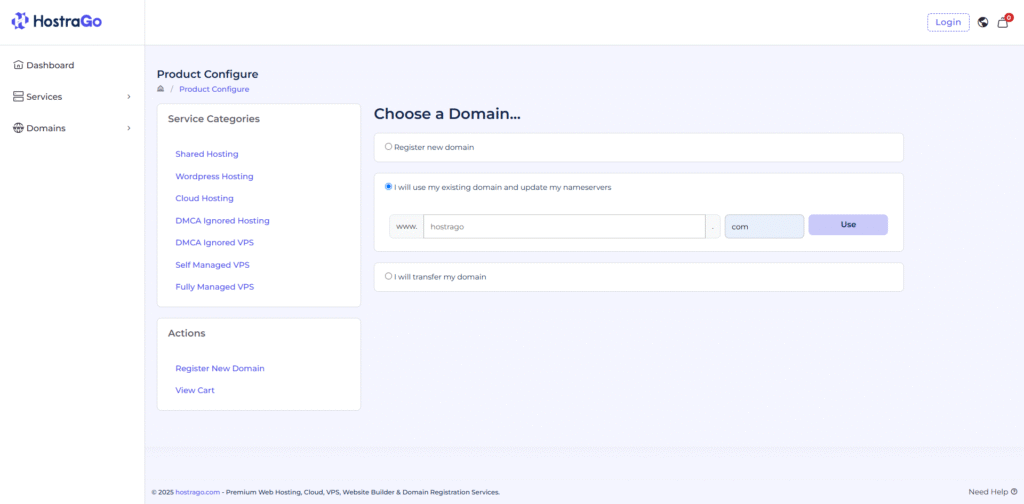
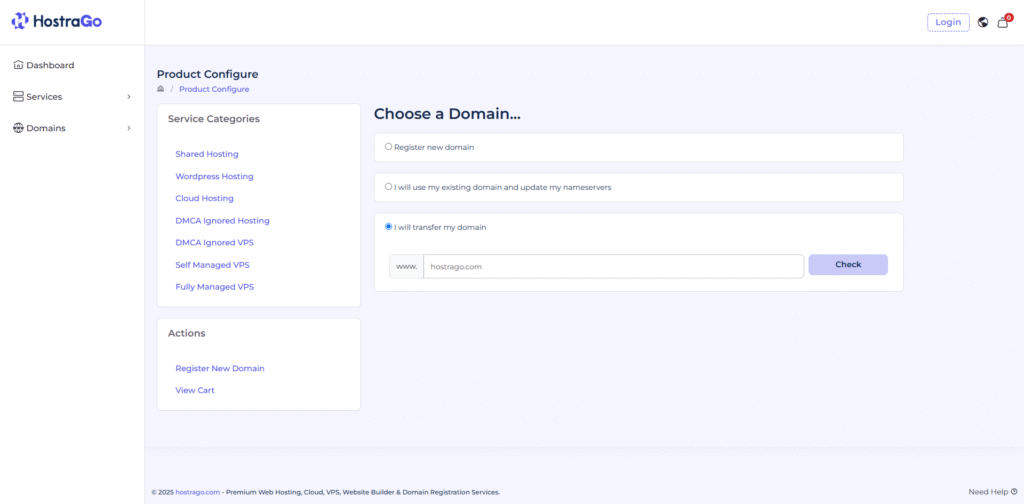
Option 3: Transfer a Domain
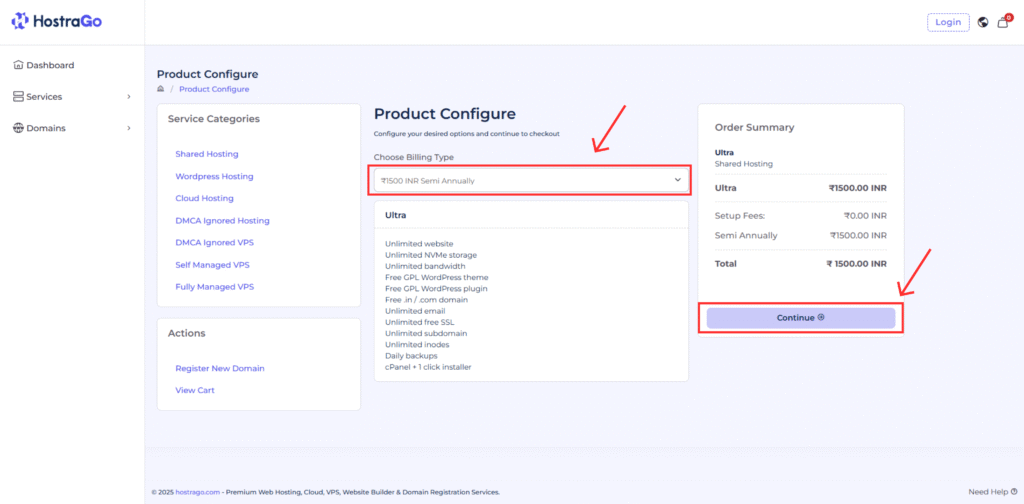
Step 3: Configure the Hosting Plan
On the product configuration screen, select your billing type (e.g., ₹1500 INR Semi Annually) and view what’s included like unlimited storage, SSL, backups, and more.
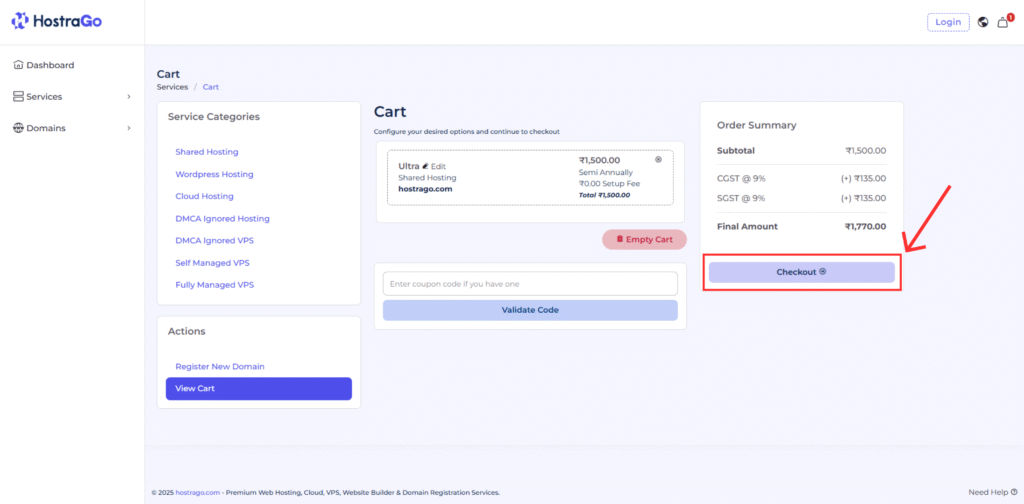
Step 4: Add to Cart and Checkout
Once your configuration is complete, review your cart summary. Make sure your plan and tax amounts are correct. Click “Checkout” to proceed.
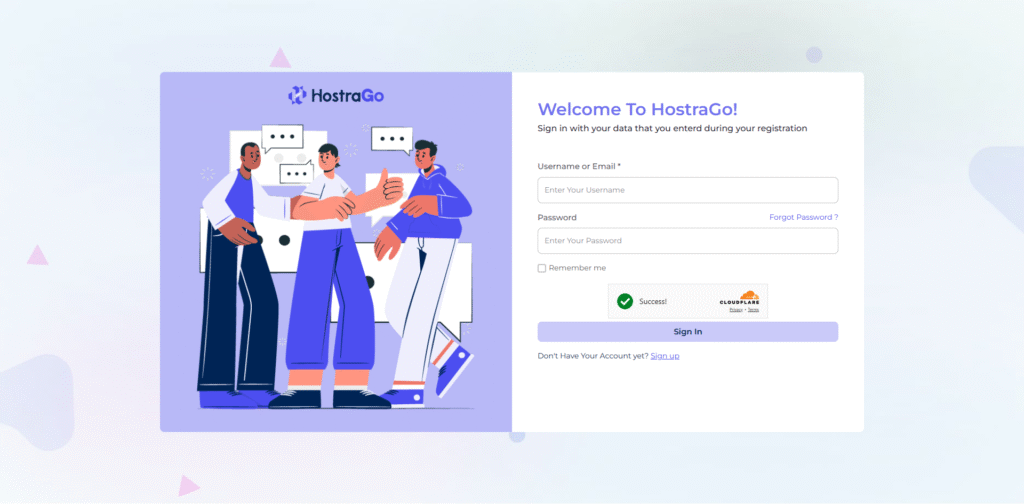
Step 5: Login or Create an Account
Login with your registered email or create a new account if you’re a first-time user.
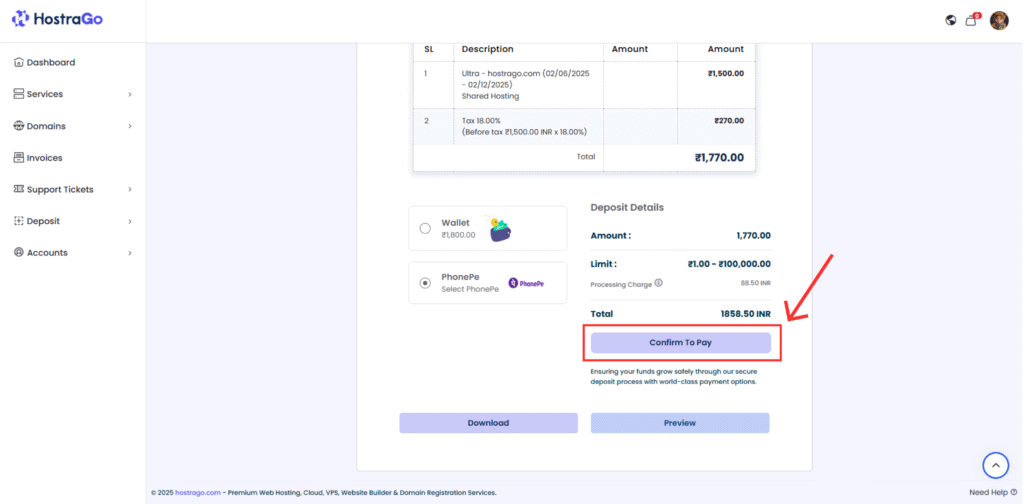
Confirm Payment
Choose your payment method (e.g., Wallet or PhonePe), review the total including processing charge, and click “Confirm to Pay”.
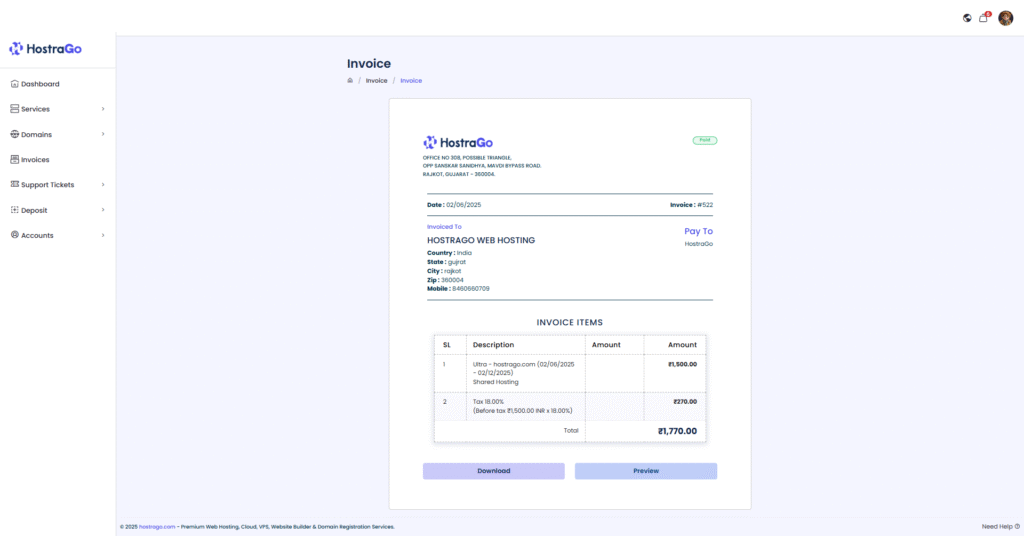
Download Invoice
After successful payment, you’ll receive an invoice with plan and tax breakdown. Click Download or Preview for your records.
Why Choose Hostrago?
- Affordable pricing starting from just Rs.59/mo
- Free SSL, backups & cPanel access
- User-friendly dashboard
- Fast support & secure infrastructure
Frequently Asked Questions
Q1. Can I use PhonePe to pay for Hostrago hosting?
Yes, PhonePe is one of the available payment methods.
Q2. Is it possible to use my current domain?
Yes, you can use an existing domain or transfer it easily.
Q3. Are Hostrago plans beginner-friendly?
Absolutely! They include one-click installation, free SSL, and cPanel access.
Q4. Is invoice available after payment?
Yes, once payment is completed, you get an auto-generated invoice.
Q5. Can I upgrade my plan later?
Yes, you can scale your plan anytime from your dashboard.
Final Thoughts
Purchasing a hosting plan from Hostrago is simple, fast, and beginner-friendly. With their intuitive dashboard, transparent pricing, and multiple domain options, even first-time users can get their website online within minutes. Whether you’re building a blog, business website, or portfolio, Hostrago offers everything you need—performance, reliability, and security—at an affordable price. By following the step-by-step instructions (with images) in this guide, you’re now fully equipped to make your purchase confidently. So why wait? Get started with Hostrago today and take the first step toward building your online presence.