
If you’re looking for an easy way to get started with HostraGo, you’re in the right place. In this guide, we’ll walk you through how to create a HostraGo account from scratch. Whether you’re a beginner or switching from another platform, this simple tutorial will help you register and start using HostraGo in just a few minutes.
What is HostraGo?
HostraGo is a user-friendly web hosting platform that offers powerful tools for managing your website, domain, and hosting services—all in one place. From intuitive dashboards to quick support, HostraGo is designed to make web hosting hassle-free.
HostraGo is a modern web hosting platform that offers a wide range of services including:
- Shared Hosting
- Cloud and VPS Hosting
- Domain Registration
- Website Builders
- Support & Billing System
It stands out for its clean UI, intuitive dashboard, and a streamlined onboarding process perfect for beginners and professionals alike.
Why Choose HostraGo?
Before jumping into the tutorial, here are a few reasons why HostraGo is a solid choice:
- ✅ Simple registration and user onboarding
- ✅ Affordable hosting packages
- ✅ Integrated domain management
- ✅ Seamless billing and ticketing support
- ✅ Clean, intuitive user dashboard
- ✅ High security with Cloudflare protection
- ✅ Indian billing support (₹ INR)
Why Learning How to Create a HostraGo Account Matters
When learning how to create a HostraGo account, one of the first things you’ll notice is the platform’s clean and simple layout. Unlike other hosting platforms that overwhelm users with too many options, HostraGo breaks it down into manageable steps: registration, verification, and dashboard setup. This user-centered approach is especially helpful for new users who may be unfamiliar with web hosting platforms.
The clear call-to-action buttons and modern form design make it obvious where to click and what to do next. This is one of the key reasons people love learning how to create a HostraGo account—it’s just so beginner-friendly.
Step-by-Step Guide to How to Create a HostraGo Account
Let’s Start How to Create a HostraGo Account journey, based on real screenshots of HostraGo’s user interface.
🔹 Step 1: Go to the HostraGo Registration Page
Visit the HostraGo registration page or click on the Sign Up button available on the homepage.
You’ll be taken to the “Create Account” page.
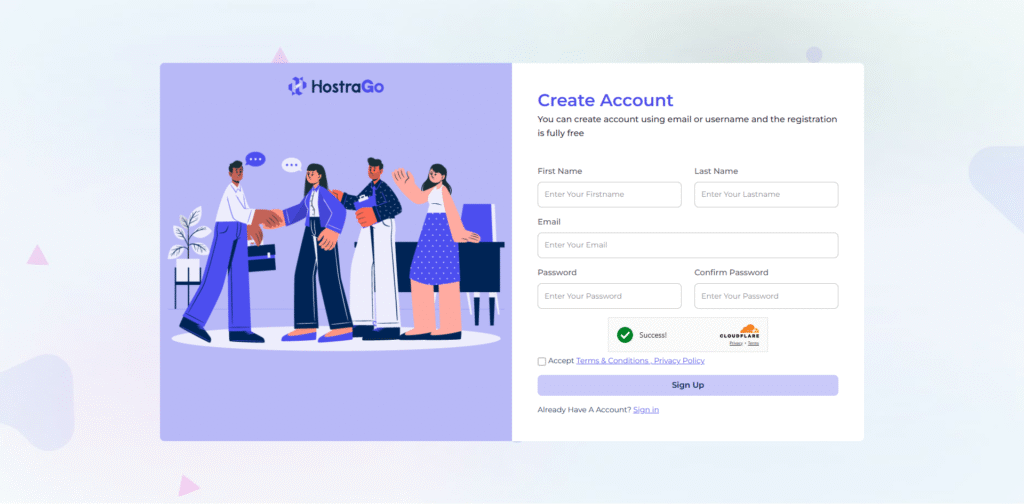
- Left side: Modern illustration with people shaking hands (welcoming).
- Right side: A registration form that asks for the following:
- First Name
- Last Name
- Email Address
- Password
- Confirm Password
At the bottom, check the “I accept Terms & Conditions” box and click Sign Up.
✅ Tip: Use a strong password with letters, numbers, and symbols for better security.
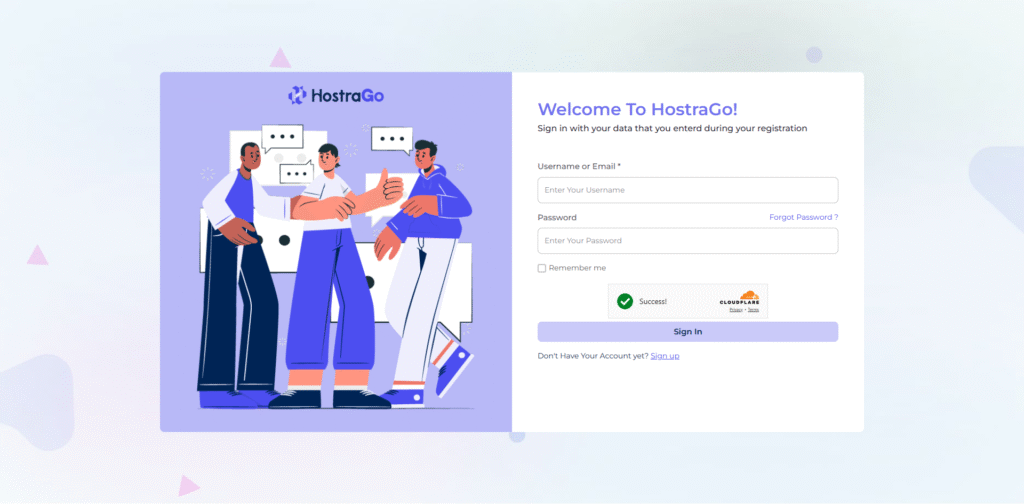
🔹 Step 2: Verify CAPTCHA and Submit
Before proceeding, HostraGo uses Cloudflare CAPTCHA to verify that you’re a human and not a bot. This adds an extra layer of security to your account.
- Complete the CAPTCHA process
- Click on “Success”
- Submit the form to proceed to the next step
🔹 Step 3: Complete Your Profile
Once your basic registration is complete, you’ll be redirected to the “Create Profile” page.
This page includes fields to personalize your account:
- Username
- Country
- Mobile Number
- Address
- State
- Zip Code
- City
📌 Note: This data is required for invoicing, support, and domain registration accuracy. Be sure to input valid information.
Click Submit once completed.
Congratulations! Your HostraGo Account is Ready 🎉
Once your profile is created, you’ll be redirected to the HostraGo Dashboard.
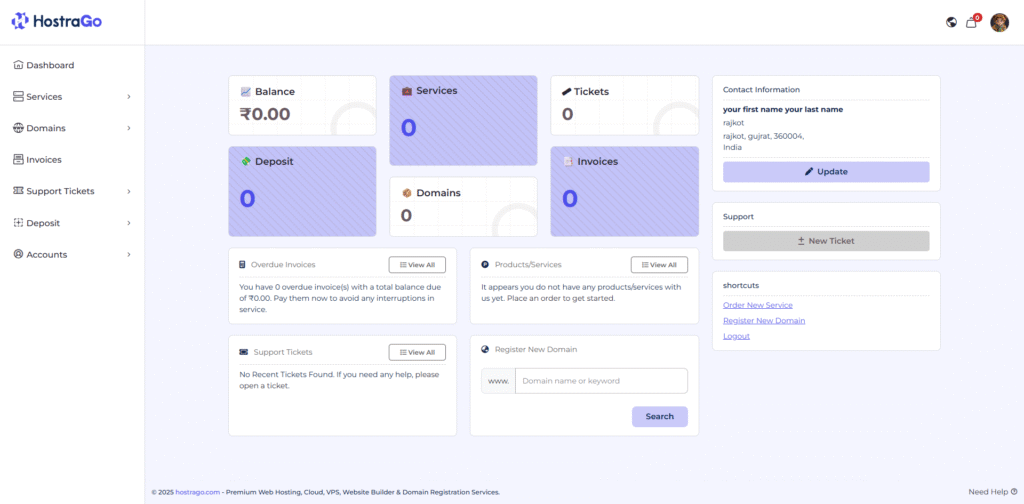
Your dashboard includes key sections:
- Balance: Displays your current wallet balance (₹0.00 initially).
- Services: Lists your hosting services (initially 0).
- Domains: Shows registered domains.
- Invoices: Track billing and overdue payments.
- Support Tickets: Open or view existing support queries.
- Deposit: Fund your HostraGo wallet.
- Shortcuts: Order new services or domains, or logout.
Exploring the HostraGo Dashboard
Let’s take a closer look at the major components of your HostraGo dashboard.
📂 1. Services
All your purchased hosting plans will be listed here. You can:
- View active or expired services
- Manage hosting settings
- Check renewal dates
🌐 2. Domains
Register, transfer, or renew domains. This panel allows:
- WHOIS management
- DNS control
- Domain lock/unlock
📄 3. Invoices
A complete record of your transactions:
- Overdue notices
- Paid invoices
- Download PDF copies
- Pay using balance or payment gateways
🎫 4. Support Tickets
Facing an issue? Raise a ticket directly from here.
- Open new tickets
- Track status
- Communicate with support staff
💰 5. Deposit
Add funds to your wallet for:
- Fast service renewal
- Instant domain registration
Supported Payment Methods (check HostraGo for updated methods):
- UPI
- Credit/Debit Cards
- Net Banking
Need Help? HostraGo Support is Here!
At the bottom-right, you’ll see a “Need Help?” option and also a “+ New Ticket” button on the main dashboard. This shows HostraGo’s commitment to proactive customer service.
You can also use:
- FAQs
- Email Support
- Live Chat (if available)
Useful Shortcuts for Quick Access
Located in the right panel of the dashboard:
- 🔄 Order New Service: Instantly buy hosting
- 🌐 Register New Domain: Search and register domains
- 🚪 Logout: Securely exit your account
Pro Tips for New Users
Here are some bonus tips to enhance your HostraGo experience:
1. Enable 2FA (Two-Factor Authentication)
For extra security, consider enabling two-factor authentication in account settings.
2. Use Your Domain for Professional Email
After registering your domain, set up a custom email like info@yourdomain.com.
3. Monitor Invoices Regularly
Avoid service interruptions by staying on top of your billing.
4. Upgrade Hosting When Needed
Start small, and scale up hosting as your website traffic grows.
SEO Best Practices While Using HostraGo
If you’re creating websites, especially for SEO-focused projects, HostraGo gives you the flexibility to:
- Deploy CMSs like WordPress in one click
- Configure SSL certificates
- Access cPanel (if included in your plan)
- Use fast SSD-based storage for quick load times
Google ranks websites better when:
- Hosted on fast servers
- With consistent uptime
- Using SSL (https)
- Have proper domain configuration
Final Thoughts
How to Create a HostraGo Account is incredibly easy and takes less than 5 minutes. From the intuitive signup process to the powerful dashboard, it’s tailored for both beginners and advanced users.
Creating a HostraGo account is fast, simple, and the first step to launching your website or online project. If you were wondering how to create a HostraGo account, we hope this step-by-step guide gave you the clarity and confidence to get started today.
Whether you’re launching your first blog, registering a custom domain, or managing cloud hosting, HostraGo is a reliable partner in your digital journey.
So don’t wait—visit HostraGo.com, register now, and bring your ideas to life on the web!
