
Managing multiple cPanel accounts requires regular monitoring of bandwidth usage, especially for high-traffic websites. If you’re a server administrator or a reseller, knowing how to change bandwidth limit of a cPanel account in WHM is crucial. WHM (Web Host Manager) allows root-level and reseller-level users to assign or modify bandwidth quotas for each account based on their needs.
Whether you’re facing sudden spikes in traffic or planning to upgrade hosting resources for your clients, the ability to change bandwidth limit ensures smooth website performance and uninterrupted access. At HostraGo, we recommend regular bandwidth reviews to prevent service suspension and improve user satisfaction.
In this tutorial, we’ll walk you through step-by-step instructions on how to modify bandwidth limits of any cPanel account directly from your WHM panel. Let’s dive in!
Why Change Bandwidth Limit in WHM?
Bandwidth defines the amount of data your website can send and receive in a given period (usually monthly). Each cPanel account has its bandwidth quota, and exceeding it can result in temporary suspension of the website.
Common reasons to change bandwidth limits:
- A website experiences unexpected traffic surges.
- A client upgrades to a higher hosting plan.
- You’re customizing limits for reseller hosting packages.
- To prevent sites from going offline due to overuse.
How to Change Bandwidth Limit in WHM? (Step-by-Step)
Let’s explore how you can change the bandwidth limit for any cPanel account using the WHM interface:
Step 1: Log in to WHM
- Access your WHM panel via:
https://yourdomain.com:2087 - Enter your root or reseller login credentials.
- Once logged in, you’ll be redirected to the WHM dashboard.
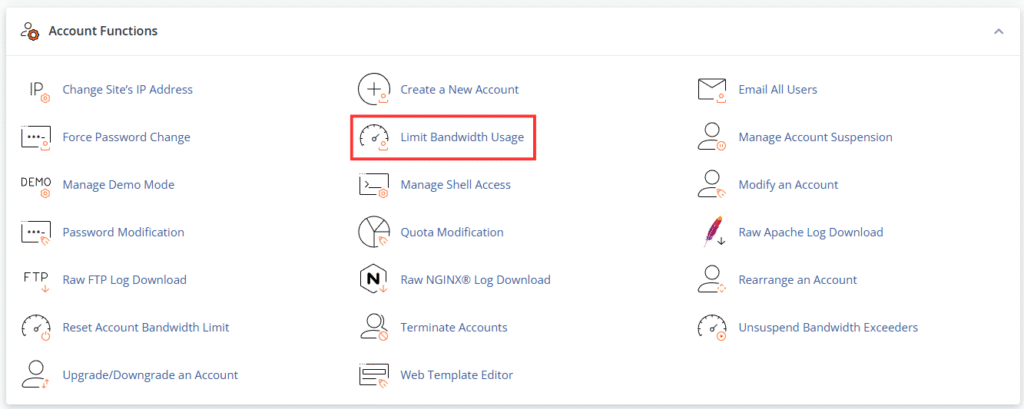
Step 2: Locate the Account
- Use the left-hand search bar and type List Accounts.
- Click on List Accounts from the search result.
- Find the cPanel account for which you want to modify the bandwidth.
- Click on the “+” icon to expand its details.
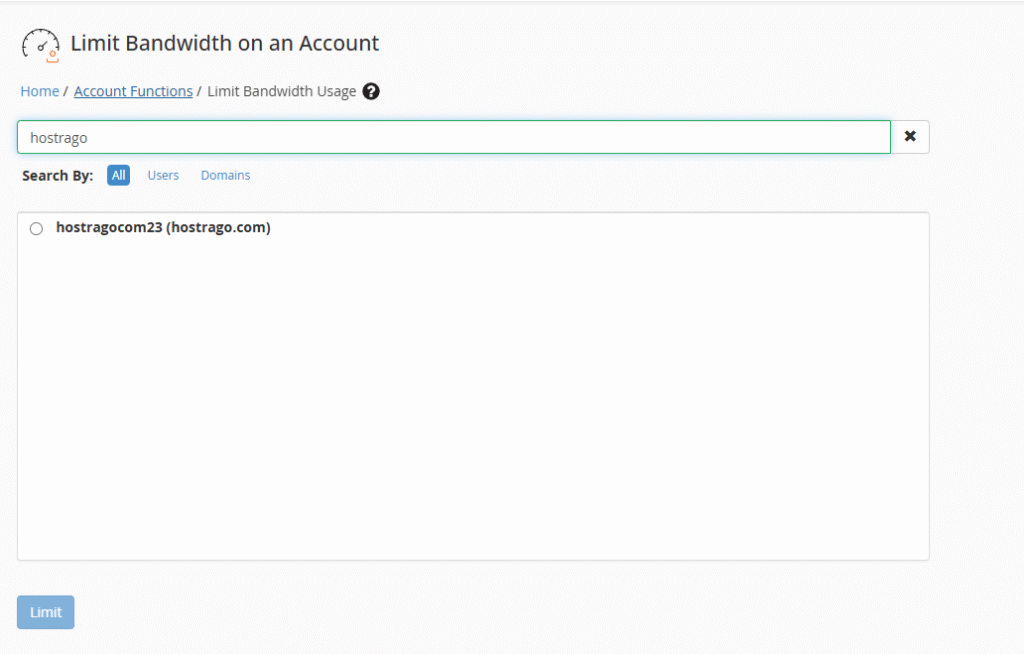
Step 3: Search the account for which you want to change the bandwidth.
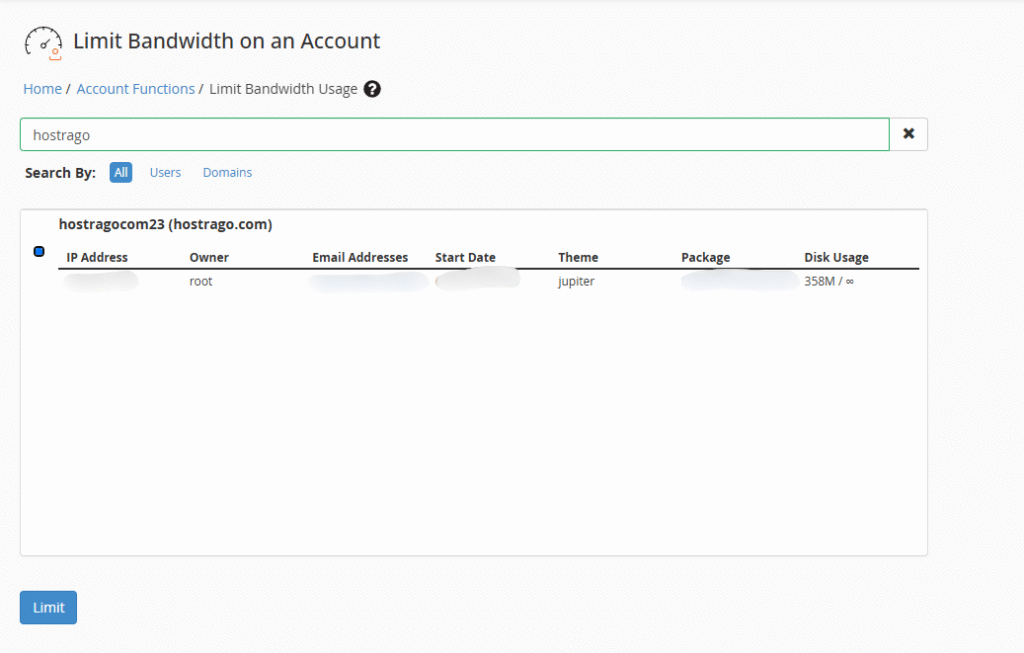
Step 4: Select the account and click on the limit button.
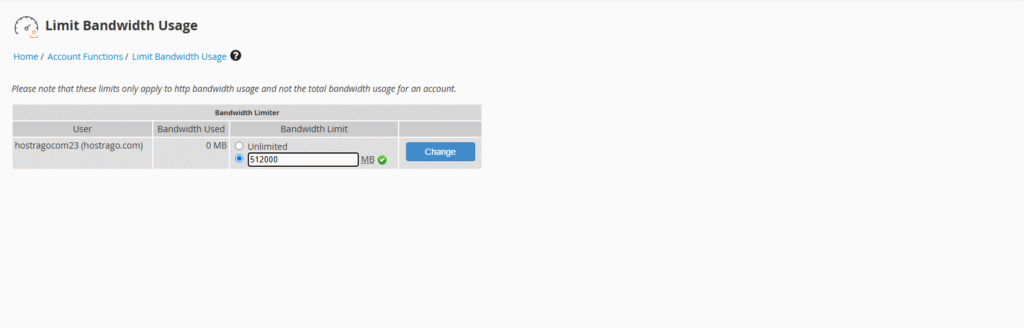
Step 5: Change the Bandwidth Limit
- Under the New Bandwidth Limit (MB) field, enter the desired bandwidth amount in megabytes (MB).
Example: Enter 50000 for 50 GB. - Click on the Change button to apply the new settings.
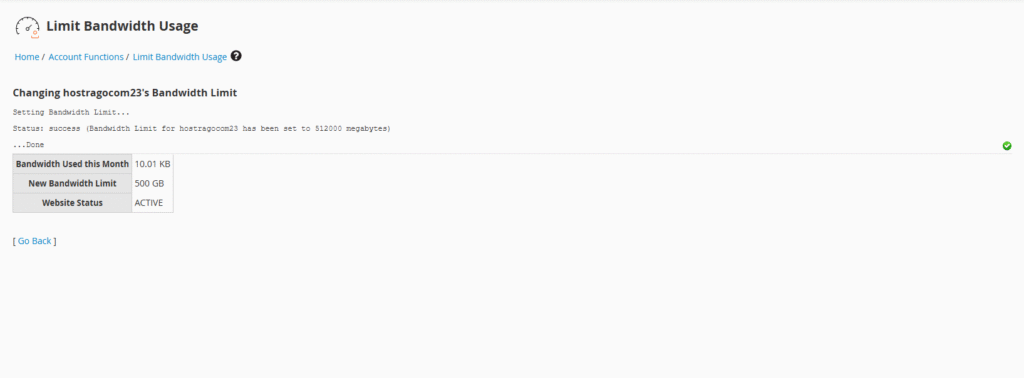
Success! The new bandwidth limit has been assigned to the cPanel account.
Important Notes
- Unlimited Bandwidth Warning: Setting bandwidth to ‘unlimited’ may lead to resource abuse. Apply this setting carefully, especially on shared servers.
- Usage Reset: Bandwidth usage is reset on the 1st of each month by default.
- Data Format: Always input bandwidth limits in megabytes (MB), not gigabytes (GB).
Need Expert Help?
If you’re unsure about how much bandwidth a website needs or want to upgrade to a more powerful hosting environment, feel free to contact HostraGo support. We’re available 24/7 to guide you through upgrades, usage reviews, or even custom hosting recommendations.
Final Words
Being able to change bandwidth limit from WHM empowers you to better manage resources and deliver uninterrupted services to clients. Whether you’re scaling an online store, running a high-traffic blog, or hosting clients as a reseller, bandwidth flexibility is key.
At HostraGo, we offer tailored hosting solutions with adjustable resource limits, reliable uptime, and expert support to back your hosting needs. Ready to take control of your hosting environment?