

Whether you’re hosting with us at Hostrago, or using another provider, applying a proper Redirect www or Non-www URLs strategy is key to search engine optimization and professional site management. Let’s dive into the process and secure your domain structure the right way.
When managing a website, domain consistency is crucial for SEO and user experience. One common issue many website owners face is handling both the www and non-www versions of their site. Without proper redirection, search engines may treat these as two separate websites, causing duplicate content issues. In this blog, you’ll learn how to redirect www or non-www URLs using the .htaccess file via cPanel, ensuring your site runs with a single canonical domain version.
Why Should You Redirect www or Non-www URLs?
Redirection is more than just a technical step—it’s a strategic move to:
- Improve SEO ranking by avoiding duplicate content.
- Maintain consistent branding across all marketing platforms.
- Enhance user experience by avoiding confusion or broken links.
- Strengthen link juice by consolidating backlinks to one version.
Most search engines prefer one version of your website. You can choose to keep either the www or the non-www version active, and redirect the other.
Prerequisites
Before starting, make sure:
- Your website is hosted on Apache server (common in shared hosting).
- You have access to your hosting cPanel.
- You can locate and edit your site’s .htaccess file (usually in the root
/public_html/directory).
Steps to Redirect www to non-www (or vice versa) via .htaccess in cPanel
Follow these simple steps to implement redirection using .htaccess:
Step 1: Log in to cPanel
- Go to your hosting provider’s cPanel login page.
- Enter your username and password to access the dashboard.
🟢 Hostrago clients can log in via this portal.
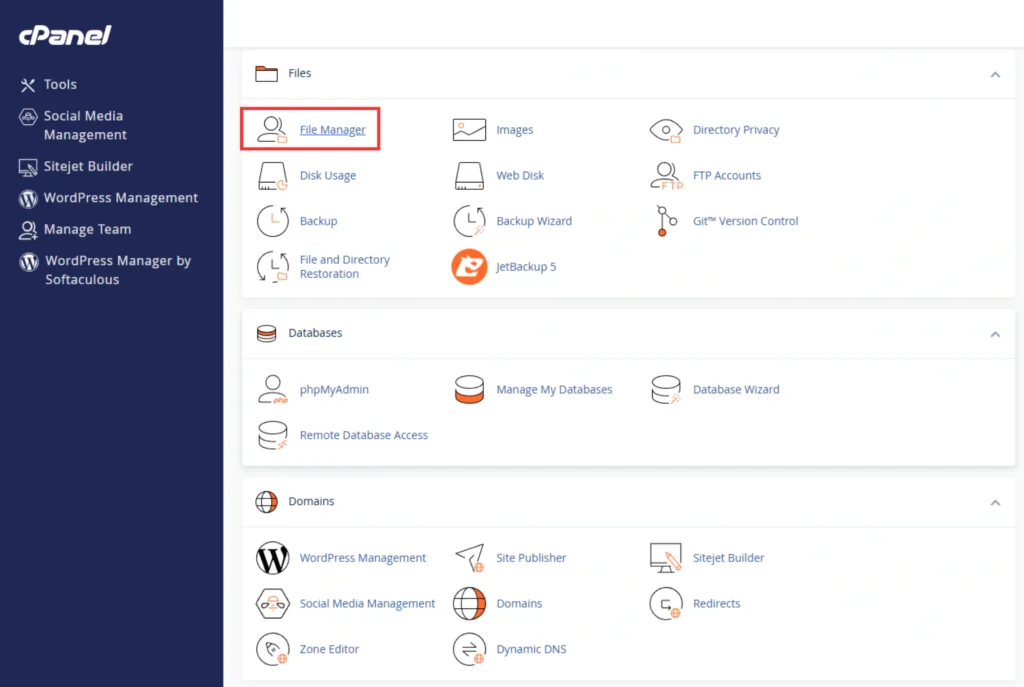
Step 2: Open File Manager
- Inside cPanel, scroll to the Files section and click on File Manager.
- Navigate to your website’s root directory, usually
/public_html.
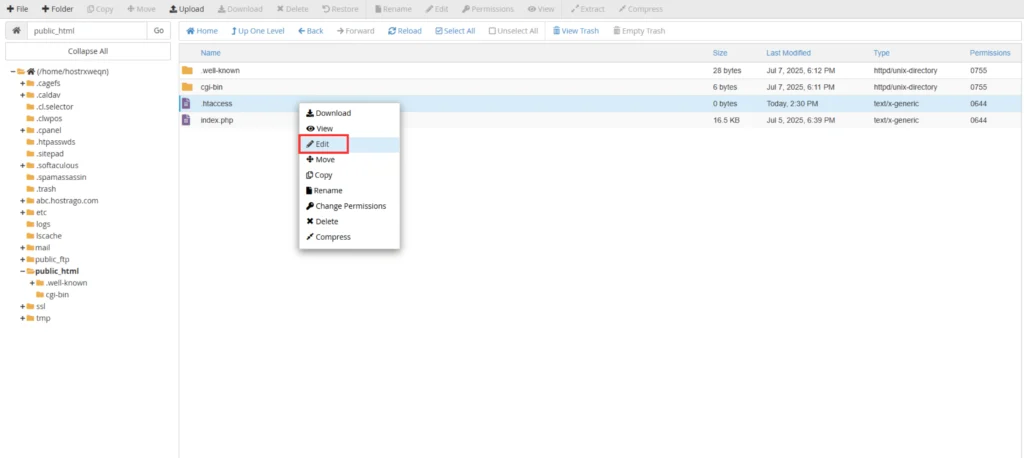
Step 3: Locate and Edit the .htaccess File
- Look for the
.htaccessfile. - If it’s not visible, click on Settings (top right corner) and enable Show Hidden Files.
- Right-click on
.htaccess→ Edit.
⚠️ Note: Backup your .htaccess before making changes.
Redirect from www to non-www
Paste the following code into the top of your .htaccess file:
RewriteEngine On
RewriteCond %{HTTP_HOST} ^www\.yourdomain\.com [NC]
RewriteRule ^(.*)$ https://yourdomain.com/$1 [L,R=301]
Replace yourdomain.com with your actual domain name.
Redirect from non-www to www
Alternatively, use this code if you want to redirect the non-www version to the www version:
RewriteEngine On
RewriteCond %{HTTP_HOST} ^yourdomain\.com [NC]
RewriteRule ^(.*)$ https://www.yourdomain.com/$1 [L,R=301]
Again, change yourdomain.com to your own domain.
Common Issues & Troubleshooting
- If your site stops working, double-check for typos in the
.htaccesscode. - Ensure the mod_rewrite module is enabled on your server.
- Clear your browser’s cache before testing.
Need expert help? Contact Hostrago Support — our team is always ready to assist.
Conclusion
Choosing between Redirect www or Non-www URLs is a small but significant decision. It’s not about which one is better, but about consistency. By learning how to Redirect www or Non-www URLs, you take control of your domain structure, SEO credibility, and user experience.
Whether you’re running a personal blog or a growing business, following this redirection strategy is essential. And if you’re hosting with Hostrago, we’ve got all the tools you need to manage these settings smoothly.
Need Help With Your Hosting Setup?
Explore our cPanel Hosting Plans or contact our support for free assistance with redirection, DNS settings, and more.