

Website speed is critical for user experience and SEO performance. One proven way to enhance your website’s speed is by setting up caching mechanisms like Memcached. Knowing how to Setup Memcached can help significantly reduce database load, improve page loading times, and provide a seamless user experience.
At Hostrago, we understand that website owners, developers, and server administrators constantly seek ways to optimize their servers. That’s why this step-by-step guide will show you how to Setup Memcached on your website using cPanel/WHM and through server-side configuration. Whether you’re running a WordPress site, custom PHP application, or any other CMS, implementing Memcached can give your site the speed boost it needs.
What is Memcached?
Memcached is a high-performance, distributed memory object caching system. It helps speed up dynamic websites by caching data and objects in RAM, reducing the number of times an external data source (like a database or API) must be read.
Key Benefits of Using Memcached
- Faster page load times
- Reduced database queries
- Improved scalability
- Lower server resource consumption
Prerequisites to Setup Memcached
Before setting up Memcached, ensure:
- Root access to your VPS or dedicated server.
- WHM/cPanel is installed.
- Sufficient server resources (RAM & CPU) to handle memory caching.
Step-by-Step Guide to Setup Memcached on Your Website
1. The first step is, login to your cPanel
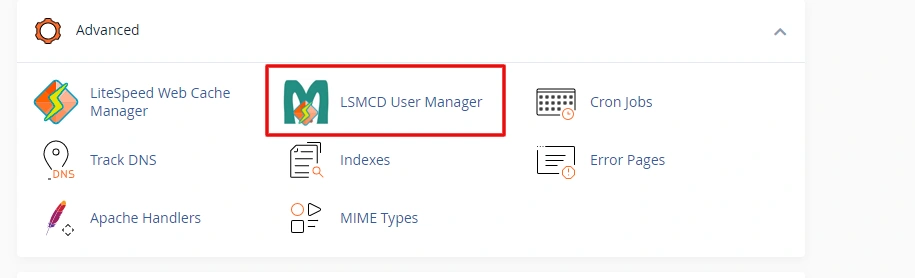
2. Go to the Advanced section and then click on the LMSCD User Manager icon.
3. Now in the next step, create a password for your LMSCD username. And then click on the Change Password button.

4. You will also have the option to set a new password for your LMSCD username.
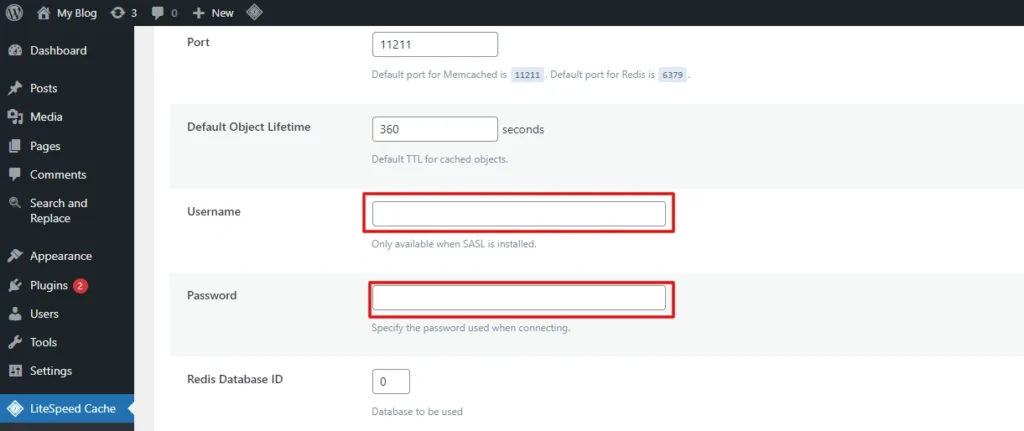
Step 5: Integrate Memcached with Your Website
For WordPress
You can use plugins like:
- W3 Total Cache
- LiteSpeed Cache
- Memcached Object Cache
These plugins easily integrate Memcached for object caching, reducing load times dramatically.
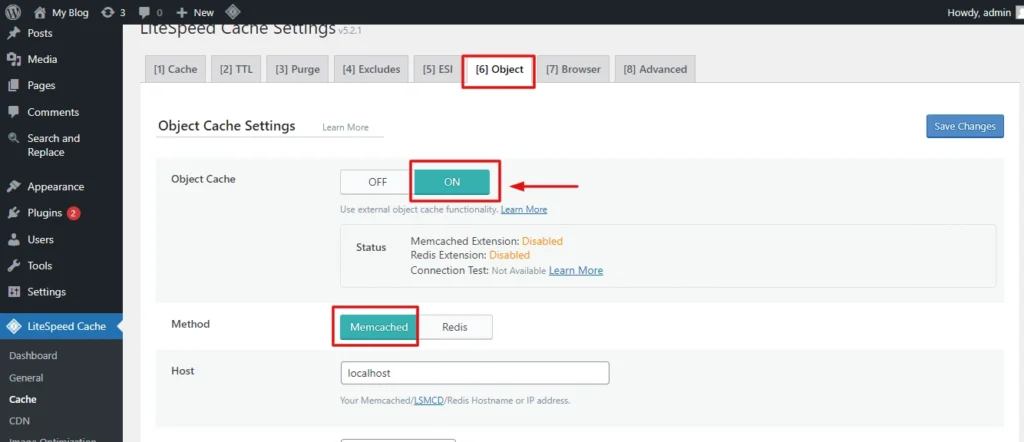
As we have mentioned above, set the Username and Password which you have set in the cPanel. All the other fields should be remained as by default.
You need to do this, for every installation of WordPress as required.
And that’s it. This is how you can enable Object Cache on your WordPress website.
Enabling Memcached for Other Web Applications
If your site is running on other platforms and you need to use Memcached, use the settings given below. It shows how to enable Object Cache.
Example configuration:
PORT="11211"
USER="memcached"
MAXCONN="1024"
CACHESIZE="256"
OPTIONS=""
Best Practices for Using Memcached
- Allocate Adequate Memory: Assign enough RAM to Memcached based on your traffic.
- Secure Access: Bind Memcached to localhost to prevent external access.
- Monitor Performance: Use monitoring tools to track cache hit/miss rates.
Conclusion
Setting up Memcached on your website can greatly enhance performance by speeding up data retrieval and reducing database queries. By following this guide, you can confidently Setup Memcached on your server and integrate it with your applications for better speed, scalability, and resource optimization.
At Hostrago, we provide optimized hosting environments that support caching mechanisms like Memcached, ensuring your websites remain fast and reliable.