How to manage DNS records of a domain in cPanel is one of the most important tasks every website owner should understand. DNS (Domain Name System) records are like digital roadmaps—they tell the internet where to find your website, email server, and other connected services. Without the right DNS settings, your domain might not function properly or could face connectivity issues. Whether you’re pointing your domain to a different host or setting up email services like Google Workspace or Zoho Mail, managing your DNS records correctly is essential.
In this detailed guide, we’ll walk you through exactly how to manage DNS records of a domain in cPanel, using the built-in Zone Editor. You’ll learn how to add, edit, or delete various DNS entries like A Records, MX Records, CNAME, TXT, and more. This process is especially easy if you’re hosting with HostraGo, as our interface is user-friendly and designed for both beginners and advanced users. By the end of this tutorial, you’ll gain full control over your domain’s DNS settings without needing advanced technical skills.
What are DNS Records?
DNS (Domain Name System) records are entries in the DNS zone file of your domain. These records tell the internet how your domain should behave. Whether it’s connecting your domain to a web server or an email provider, DNS records are the backbone of that configuration.
Common DNS Records:
- A Record: Maps domain to an IP address
- CNAME Record: Maps one domain to another
- MX Record: Directs emails to the right server
- TXT Record: Used for SPF, DKIM, and domain verification
- SRV Record: Specifies a port for services
- AAAA Record: Maps domain to an IPv6 address
Step-by-Step Guide: How to Manage DNS Records of a Domain in cPanel
Step 1: Log In to Your cPanel
Access your hosting account dashboard and log in to your cPanel.
Step 2: Locate “Zone Editor” Tool
- Scroll to the Domains section in cPanel.
- Click on Zone Editor.
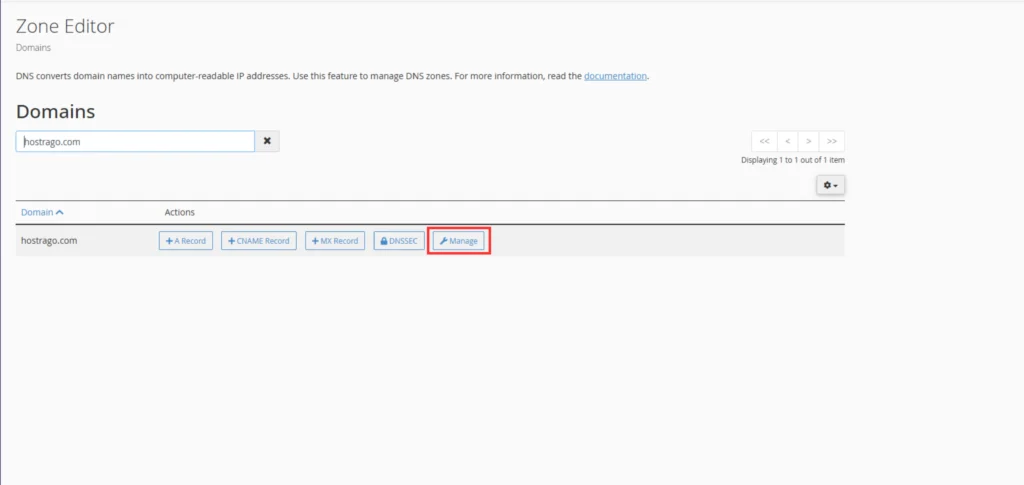
Step 3: Choose the Domain You Want to Manage
- Find your desired domain name from the list.
- Click on Manage next to it to view existing DNS records.
Add a New DNS Record
How to Add Add a CNAME Recordan “A” Record
An A Record maps a domain name to an IP address. This is useful when pointing your domain to a web server.
- Find your domain (e.g.,
hostrago.com) and click on + A Record.

Enter the subdomain (e.g., www.hostrago.com) and the destination IP (e.g.92.198.0.1)

Click Add An A Record to save.
How to Add a CNAME Record
A CNAME Record aliases one domain to another (e.g., pointing blog.hostrago.com to hostrago.com).
- Click + CNAME Record

- Add the name and the target domain

- Click Add a CNAME Record
How to Add a TXT Record
1. TXT record is the text record. You can add SPF and DKIM records using the TXT record. First, click on the manage button.
2. Click on the TXT filter option to display only TXT records.

3. Click on the “+ Add Record” button on the right.
4. Choose Add “TXT” Record from the dropdown menu.

5. Name: Enter the domain or subdomain (e.g., @ or hostrago.com.).
6. TTL: Set a time-to-live value (default is 14400).
7. TXT Data: Enter the TXT value (e.g., SPF or verification code).
Click Add Record or Save Record to finish.
Edit DNS Records
1. If you want to change the current DNS records, you can easily do it using the Edit option. To edit any record, click on the Edit option as shown in the below screen capture
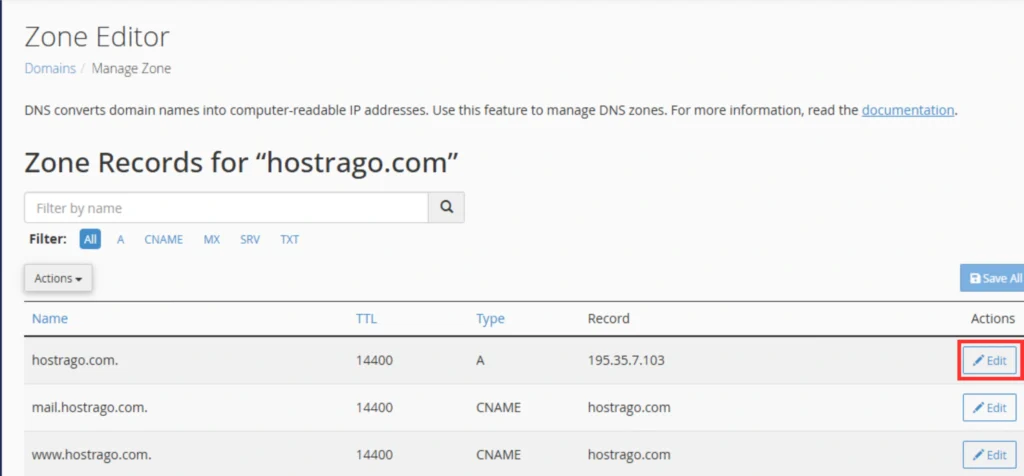
2. It will load the settings configured currently. You can make necessary changes as per your need and click on the Save Record button.
Delete DNS Records
1. You can delete any DNS record if it doesn’t require for your domain. Deleting a DNS record may interrupt the related service; hence, before deleting a record, make sure that it is unnecessary.
2. You can delete any record by clicking on the Delete option as shown in the below screen capture

Conclusion
How to Manage DNS Records of a Domain in cPanel gives you the flexibility to control how your domain connects to various services. Whether you’re configuring email routing, updating your server IP, or setting up domain verifications, cPanel’s Zone Editor makes the process straightforward.
For more tutorials on managing your domain and hosting, visit the HostraGo Knowledge Base.