At Hostrago, we understand that database control is a key part of efficient hosting. That’s why in this blog, we’ll show you exactly how to grant all privileges MySQL for a user using cPanel. Whether you’re a beginner or experienced webmaster, this guide will walk you through the entire process with clarity and simplicity.
Managing databases is an essential part of website hosting and development. Whether you’re setting up a CMS like WordPress, creating a custom web application, or simply managing data, you’ll often need to grant full access to a MySQL user. This process is crucial for maintaining seamless database operations. If you’re wondering how to grant all privileges in MySQL via cPanel, you’re in the right place.
Why Grant All Privileges to a MySQL User?
When managing a MySQL database, a user may require full permissions to perform tasks like:
- Creating, modifying, and deleting tables
- Importing or exporting database content
- Managing indexes and relationships
- Running complex queries or backups
Granting all privileges ensures the user can handle every aspect of database interaction. However, it should be used with caution—only trusted users should be granted full access.
Step-by-Step Guide: Grant All Privileges in MySQL Using cPanel
Let’s dive into the process of assigning all MySQL privileges to a user in cPanel.
Step 1: Log in to Your cPanel Account
First, access your cPanel account through your hosting provider. You can do this via:
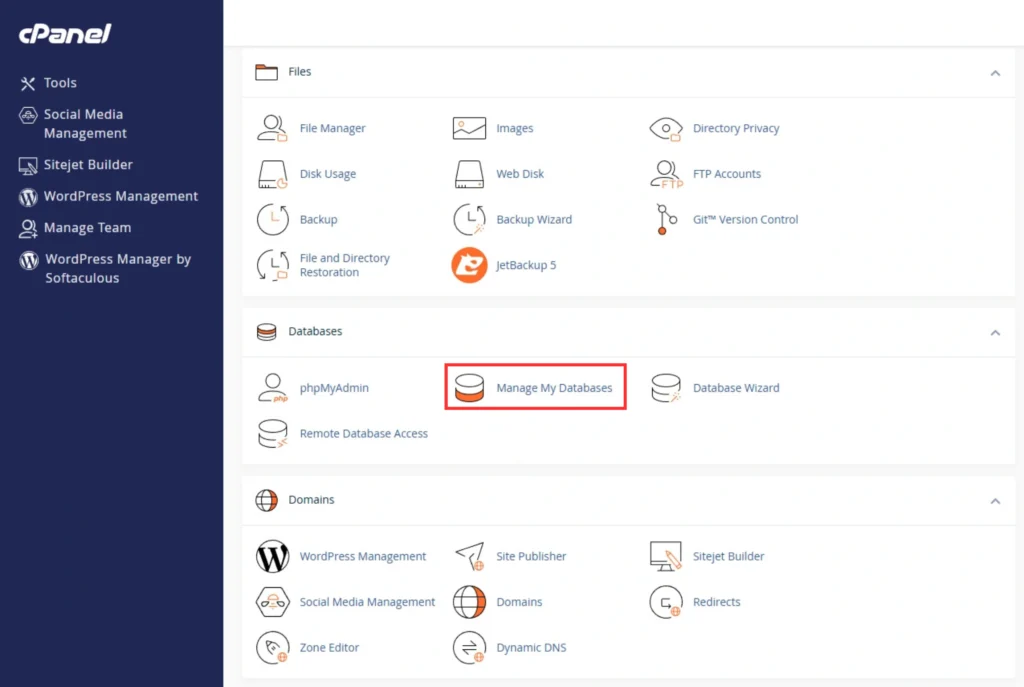
Step 2: Navigate to “MySQL® Databases”
Click on the MySQL® Databases option under the Databases section.

Step 3: Create a New Database (If Needed)
If you haven’t already created a database:
- Enter a name under “Create New Database”.
- Click Create Database.
Step 4: Create a New MySQL User
Scroll to the “MySQL Users” section:
- Enter a Username.
- Create a strong Password or use the password generator.
- Click Create User.
Step 5: Add User to Database
In the Add User To Database section:
- Select the user you created from the dropdown list.
- Select the database you want to assign them to.
- Click Add.

This will redirect you to the privileges assignment page.
Step 6: Grant All Privileges to the User
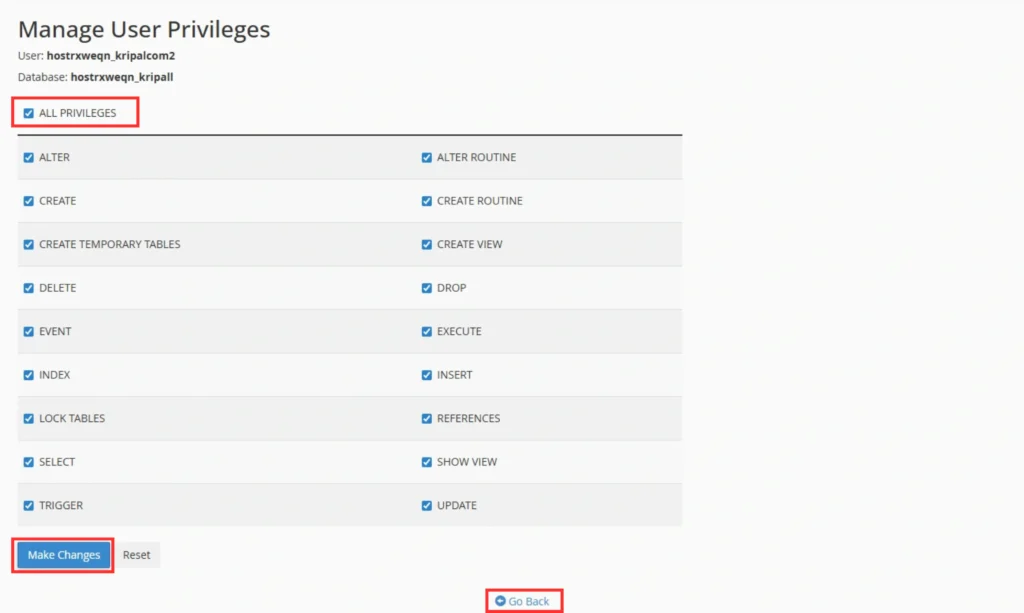
On the “Manage User Privileges” screen:
Check the box next to ALL PRIVILEGES.
Then, scroll down and click Make Changes.

You will come back to the MySQL® Databases. Here, you can spot the user you just granted privileges under the Privileged Users column of the Current Databases table.

How to Verify User Privileges?
To double-check if the user has been granted all privileges:
- Return to the MySQL Databases section.
- Locate the database and check the “Privileged Users” section.
- Click the user’s name to view/edit privileges.
Need Assistance?
At Hostrago, we provide top-tier support for all your hosting and database management needs. Whether you’re facing issues with MySQL privileges or setting up your site, our expert team is ready to help.
💡 Explore our cPanel Hosting Plans to experience smooth and secure website hosting.
Conclusion
Granting all privileges to a MySQL user through cPanel is a straightforward process, but it’s a powerful one. With just a few clicks, you can provide a user with full control over a database—ideal for developers and applications that need advanced access. Always manage privileges carefully, and only assign full rights when necessary.
Need more help with MySQL or cPanel? Visit our Knowledge Base for more in-depth tutorials, or reach out to our support team for guidance.


